So i’m using visual studio and doing .net mvc web development with angular. I wanted to try out react and there is a new version of aspnet core out there so i thought what the hell i will give it i try. I will assume some knowledge of asp.net mvc, javascript and this is just a “how did i set it up” not a “i will learn you everything”.
One thing that i find confusing is the core versioning, Scott Hanselman said in the lastest standup that it isn’t really that hard if you tell it the right way. I think that MS haven’t done that really. There is Runtime, SDK and Tooling all of them in different versions. But i figured it out (just dowloaded the lastet ones and prayed) 🙂
Before i get started in how i did this you will need to know that all i wanted was to get something up and running ie bare minimum. I know there is templates in both dotnet cli and VS 2017 but i wanted to do it from scratch. The tools i will be using is Visual Studio code, dotnet cli and node with yarn as the package manager.
So let’s get started! Buckle up…
First download and install ASP.NET Core SDK 1.1
Install Node and install Yarn when you have these things installed you are ready to go.
For IDE i’m using Visual Studio Code as mentioned above, you can install that if you wan’t a really smooth experience with intellisense and so on but any text editor will do.
The first thing we need to do is create a new dotnet application, i will go with the default mvc template. Open up a command prompt and execute the following commands:
|
|
mkdir coremvcreact cd coremvcreact dotnet new mvc |
After that you will have a folder with these files and folders: 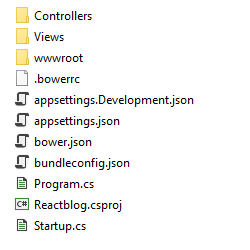
Then in the same command prompt we can execute these commands to see if it runs:
If everything goes well we should be able to open http://localhost:5000 in your browser and see the default mvc biolerplate page.
Let’s go on and install some clientside packages via yarn (uses npm repository) first of init a package.json by running
We will be prompted with some questions i will for now just press enter until the file package.json is generated. This is what we will end up with:
|
|
{ "name": "foldername", "version": "1.0.0", "main": "index.js", "license": "MIT" } |
Now we are going to add the dependencies and devDependencies we require to create a super basic react application, a super neat feature of Visual Studio Code is that you will get intellisense and autocomplete! in package.json sweetness. This is what the finished package.json will look like.
1 2 3 4 5 6 7 8 9 10 11 12 13 14 15 16 17 18 19 20 21 |
{ "name": "ReactTest", "version": "1.0.0", "main": "index.js", "license": "MIT", "dependencies": { "react": "^15.4.2", "react-dom": "^15.4.2" },"devDependencies": { "aspnet-webpack": "^1.0.28", "aspnet-webpack-react": "^1.0.5", "babel": "^6.23.0", "babel-core": "^6.24.0", "babel-loader": "^6.4.0", "babel-preset-es2015": "^6.24.0", "babel-preset-react": "^6.23.0", "babel-preset-stage-0": "^6.22.0", "webpack": "^2.2.1", "webpack-hot-middleware": "^2.17.1" } } |
The dependencies is just react and react-dom these are needed for react to even think about running 😉
The babel packages is for transpiling “newer” javascript to javascript that current browsers understand. webpack is for utilizing and doing the packaging of the javascript. We will later go into how that’s done with webpack.config.js
The aspnet-* packages is for running the SpaServices in development mode.
Save the file and go to the command prompt and execute
to install all the packages. we could have just run
|
|
yarn add packagename packagename <-- for dependencies yarn add --dev packagename packagename <-- for devDependencies |
but i prefer VS Code with autocomplete.
With ASP.NET Core back to csproj files again we are going to add the SpaServices package to the csproj file.
|
|
<ItemGroup> <PackageReference Include="Microsoft.AspNetCore" Version="1.1.1" /> <PackageReference Include="Microsoft.AspNetCore.Mvc" Version="1.1.2" /> <PackageReference Include="Microsoft.AspNetCore.StaticFiles" Version="1.1.1" /> <PackageReference Include="Microsoft.Extensions.Logging.Debug" Version="1.1.1" /> <PackageReference Include="Microsoft.VisualStudio.Web.BrowserLink" Version="1.1.0" /> <PackageReference Include="Microsoft.AspNetCore.SpaServices" Version="1.1.0" /> <!-- Add the following package --> <PackageReference Include="Microsoft.AspNetCore.SpaServices" Version="1.1.0" /> </ItemGroup> |
The run
Now we are ready to clean up in the folders and start writing some code. Delete the following folders and files in wwwroot also remove the bower files in root.
Now we need to create these folders and files
|
|
webpack.config.js App\index.js App\Components\Main.js |
Open the webpack.config.js and paste the following code:
1 2 3 4 5 6 7 8 9 10 11 12 13 14 15 16 17 18 19 20 21 22 23 24 25 26 27 28 29 30 31 32 33 34 35 36 37 38 39 40 41 42 43 44 45 46 |
const path = require('path'); const webpack = require('webpack'); const outputDir = './wwwroot/js' module.exports = (env) => { const isDevBuild = !(env && env.prod); return[{ entry:{app: './App/index.js'}, output: { path: path.resolve(__dirname, outputDir), filename: '[name].bundle.js', publicPath: '/js/' }, module: { rules: [ { test: /\.js/, exclude: /node_modules/, use: [{ loader: 'babel-loader', options: { presets: [['es2015', { "modules": false }], 'react', 'stage-0'] } }] } ] }, plugins: [ new webpack.optimize.CommonsChunkPlugin({ name: 'commons', filename: 'commons.js', minChunks: 2 }) ].concat(isDevBuild ? [ // Plugins that apply in development builds only new webpack.SourceMapDevToolPlugin({ filename: '[file].map', // Remove this line if you prefer inline source maps moduleFilenameTemplate: path.relative(outputDir, '[resourcePath]') // Point sourcemap entries to the original file locations on disk }) ] : [ // Plugins that apply in production builds only new webpack.optimize.UglifyJsPlugin() ]), }] } |
Most of this is just copied from the JavaScriptServices templates and it’s pretty straight forward. What’s the entry of our app ./App/index.js where should webpack output the result ./wwwroot/js and the name will be app.bundle.js
The module part is where babel comes in, we tell webpack to look for *.js files but not in the node_modules folder. Use the babel-loader and the presets defined in options.
The plugins is not bare minimum but handy the first one CommonChunksPlugin will look for parts that are included in more then 2 places and separate them to their own .js file. And if there is a dev build we also generate Source maps for the js files generated.
Because we used the mvc template when running dotnet new we get some boilerplate code we don’t need. So change these files Views\Shared\_Layout.cshtml and Views\Home\Index.cshtml to this:
|
|
<!DOCTYPE html> <html> <head> <meta charset="utf-8" /> <meta name="viewport" content="width=device-width, initial-scale=1.0" /> <title>@ViewData["Title"] - ReactTest</title> </head> <body> @RenderBody() @RenderSection("Scripts", required: false) </body> </html> |
|
|
<div id="react-app"> </div> @section scripts{ <script src="~/js/commons.js"></script> <script src="~/js/app.bundle.js"></script> } |
Lets add code to the react js files we created earlier
|
|
App\index.js App\Components\Main.js |
|
|
import React, { Component } from 'react'; import {render} from 'react-dom' import Main from './Components/Main' render(( <Main /> ), document.getElementById('react-app')); |
|
|
import React, { Component } from 'react'; class Main extends Component { render() { return ( <div> This is the Main Component </div> ); } } export default Main; |
Now if we try to run
we will see this error in the console 
this is because we have not packed the javascript files with webpack yet, run this (if we have wepack installed globally, if not read below)
For this to work we need to install webpack globally, i could not get this to work with yarn if you do it’s good to go but i needed to run
Then we can run dotnet run again. Tadaaaa it works we should now have this amazing react component showing in the browser
Now for the hot module reloading we need to add a few lines of code in Startup.cs
1 2 3 4 5 6 7 8 9 10 11 12 13 14 15 16 17 18 19 20 21 22 23 24 25 26 27 28 29 |
public void Configure(IApplicationBuilder app, IHostingEnvironment env, ILoggerFactory loggerFactory) { loggerFactory.AddConsole(Configuration.GetSection("Logging")); loggerFactory.AddDebug(); if (env.IsDevelopment()) { app.UseDeveloperExceptionPage(); //**THIS IS WHAT WE NEED TO ADD app.UseWebpackDevMiddleware(new WebpackDevMiddlewareOptions(){ HotModuleReplacement = true, ReactHotModuleReplacement = true }); // ** } else { app.UseExceptionHandler("/Home/Error"); } app.UseStaticFiles(); app.UseMvc(routes => { routes.MapRoute( name: "default", template: "{controller=Home}/{action=Index}/{id?}"); }); } |
Remember to add a using at the top
|
|
using Microsoft.AspNetCore.SpaServices.Webpack; |
Now delete the files in wwwroot\js and run the project again. Remeber these js-files is only there because we build them with the webpack command and we do not wan’t that. We wan’t everything to run with the following command so let’s try
Gah! Darn why doesn’t it work? Remember the code we put in Startup.cs for WebpackDevMiddleware it’s in a if statement to only run if the Hosting environment is in development mode and what do we see when running dotnet run?
|
|
Hosting environment: Production Content root path: D:\folder\Reacttest Now listening on: http://localhost:5000 Application started. Press Ctrl+C to shut down. |
That’s right t’s running in production by default. It’s an easy fix we just need to set the env to development and this is how we do it in different command promps / terminals
|
|
// PowerShell $env:ASPNETCORE_ENVIRONMENT="Development" // Windows cmd set ASPNETCORE_ENVIRONMENT=Development // *Nix export ASPNETCORE_ENVIRONMENT="Development" |
Run the correct one for your environment and then run again
If we try to change the text in Main.js and save we will see in the browser that it tries to HOT Reload but it won’t work because of
|
|
The following modules couldn't be hot updated: (Full reload needed) |
We need to accept hot reloading by changing the index.js to this
|
|
import React, { Component } from 'react'; import {render} from 'react-dom' import Main from './Components/Main' render(( <Main /> ), document.getElementById('react-app')); // ADD THIS if(module.hot){ module.hot.accept() } |
Now save and do a full refresh of the browser then try to change the text in Main.js again
YIIIIHAAAA! We are live. Let’s just end here and i will get back to other stuff in a later post on how to expand on this.
Please let me know in the comments if there is better ways of doing these stuff i would appreciate it.
Code is up on github
Thanks for now